I was asked how to add a Racquetball Court Map to a website managed via Weebly this weekend. I documented the process that resulted in the maps on Tennessee Racquetball’s and Virginia Racquetball’s websites.
{Disclaimer: I think the maps on Georgia Racquetball, Alabama Racquetball, and Austin Racquetball are much more full featured and a better solution, but that map solution does require WordPress, and the steps below work with anything.}
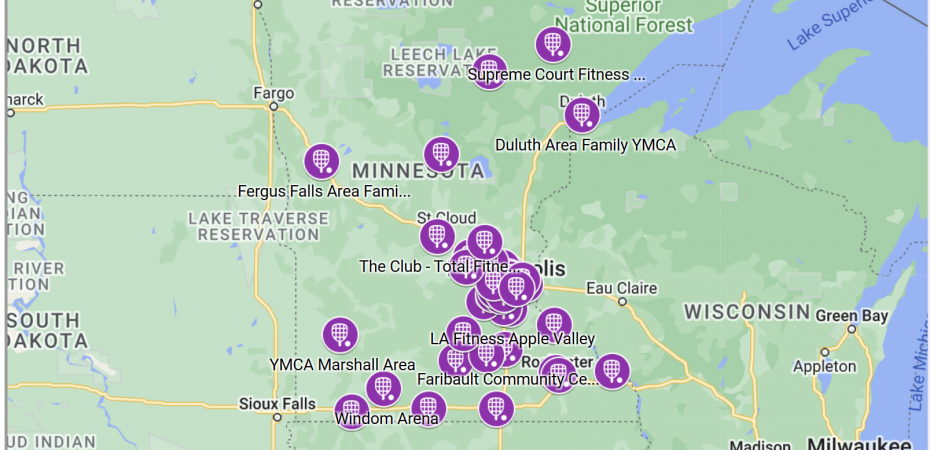
–Want to see what the results look like before you invest the time?
http://dailyracquetball.com/where-to-play-racquetball/
There is a basic Google Maps process that allows you to control what is displayed with each address, and you can use this to create a map of court facilities in your state. This is useful if you have rolled your own HTML or if you are using things like WIX, Weebly, SquareSpace, and other non-WordPress solutions.
(I endorse WordPress. Contact me for the plug-in that makes much better full featured maps.)
Start by creating a CSV file of the racquetball facilities that you want to appear on the map.
Format it like this:
Facility, Street, City, State, Zip, Website, Phone, Courts, Etc
“YMCA Yellow”, “123 Blue Street”, “San Diego”, “CA”, “92105”, “https://jt-rb.com”, “800-555-1212”, “4 courts”, “Leagues on Tuesdays”
i.e. Column names separated by commas
then each record with the items to go in the columns grouped by commas (Don’t use the quotes.)
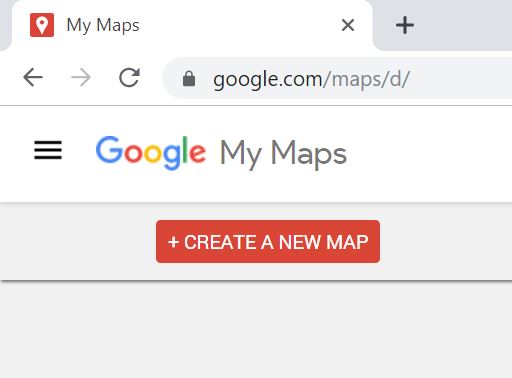
Log into your Google account and then go here:
https://www.google.com/maps/d/
Click on Create a New Map.
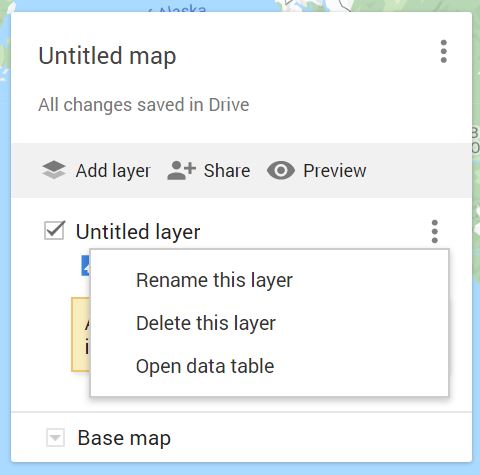
Click on the three dots to the right of the Untitled Layer checkbox.
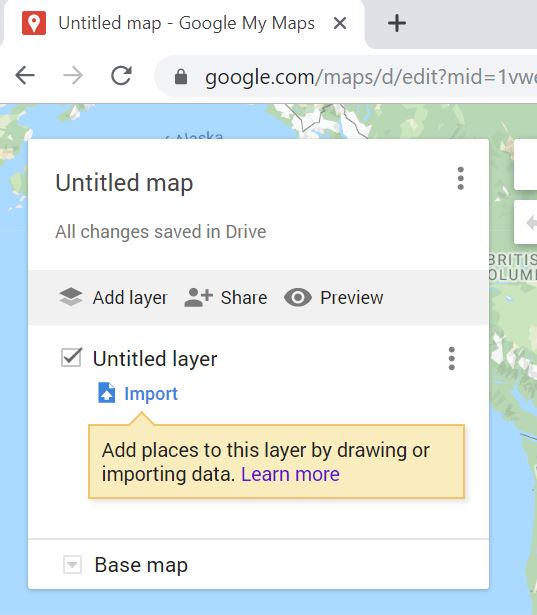
Choose Rename This Layer.
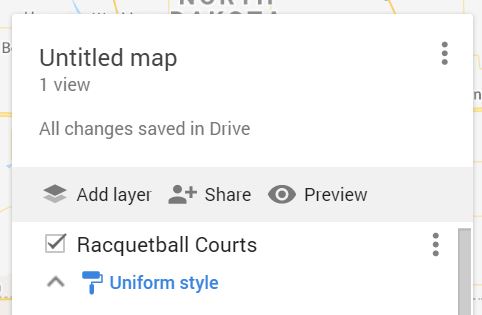
Name it something like “MyState Racquetball Facilities” or “Racquetball Courts”.
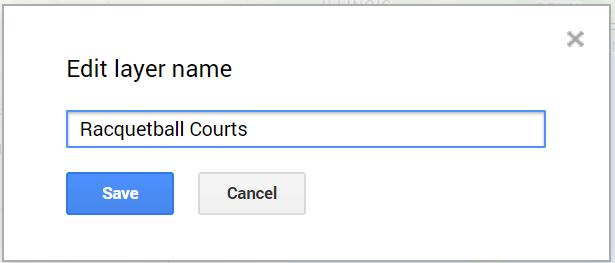
Click on Save.
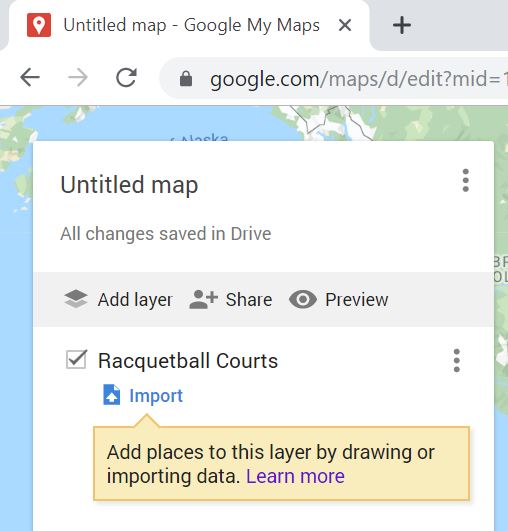
Click on Import just below your new Layer.
Click on Select a file from your device.
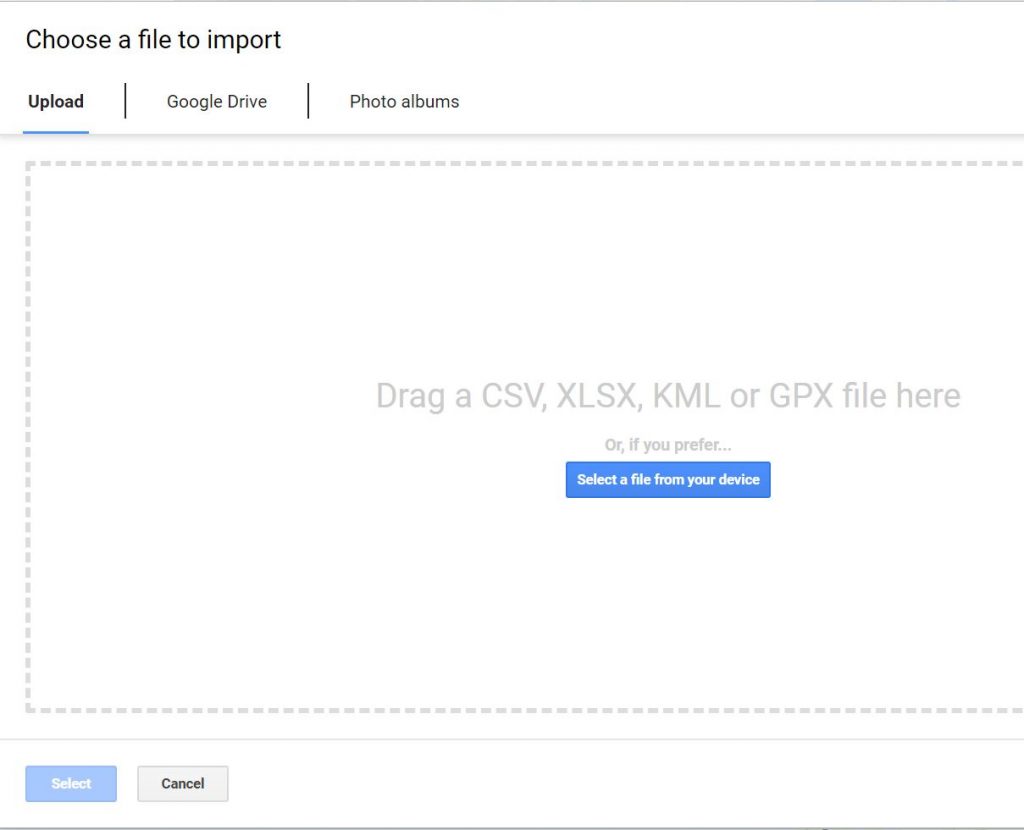
Browse to your CSV file and click on Open.
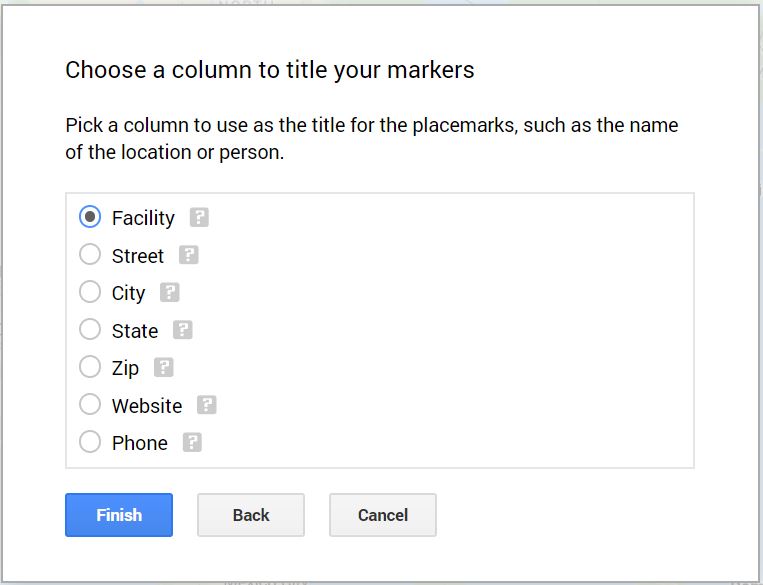
Add checks to:
Street
City
State
Zip
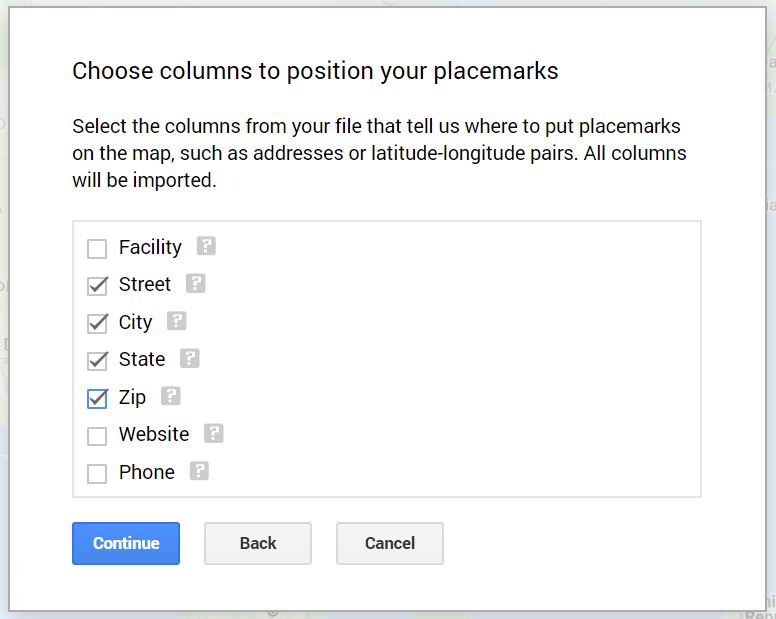
Click on Continue.
Add the dot to Facility and click on Finish.
Click on a few of the new spots on the displayed map to verify that the information imported correctly.
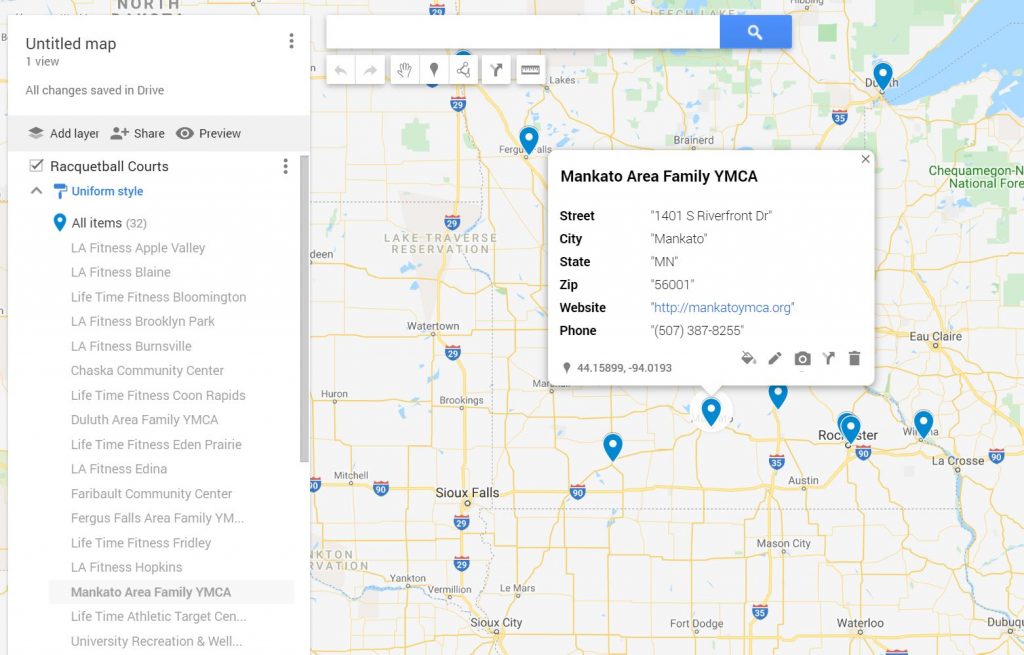
Click on the Preview button to see what the functionality will display, and navigate thru a few more facilities to continue spot checking the data import.
When satisfied with the map in the Preview, go back to the working map.
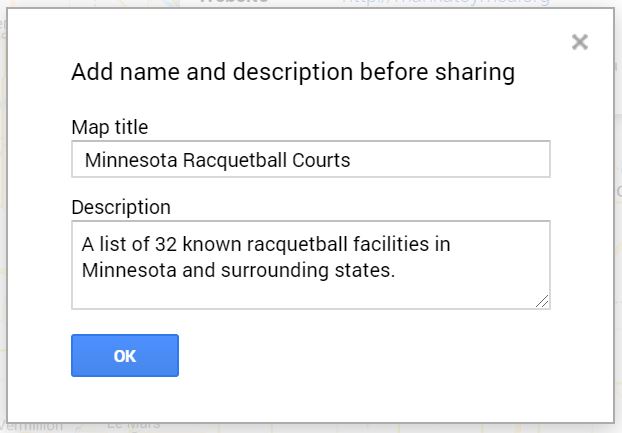
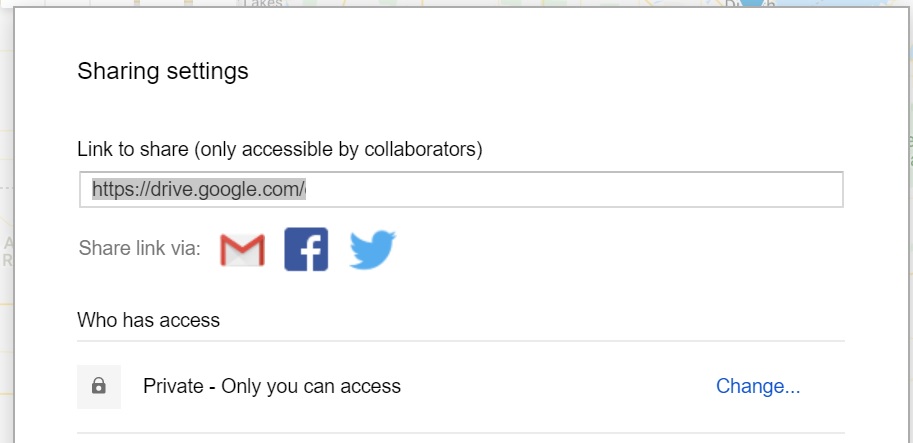
Click on Share.
Give the map a name.
Give the map a description.
Click on OK.
In the Who Has Access section,
Change it from Private to
ON – Public on the web
Verify that
Access: Anyone (no sign-in required)
is set to “Can View”.
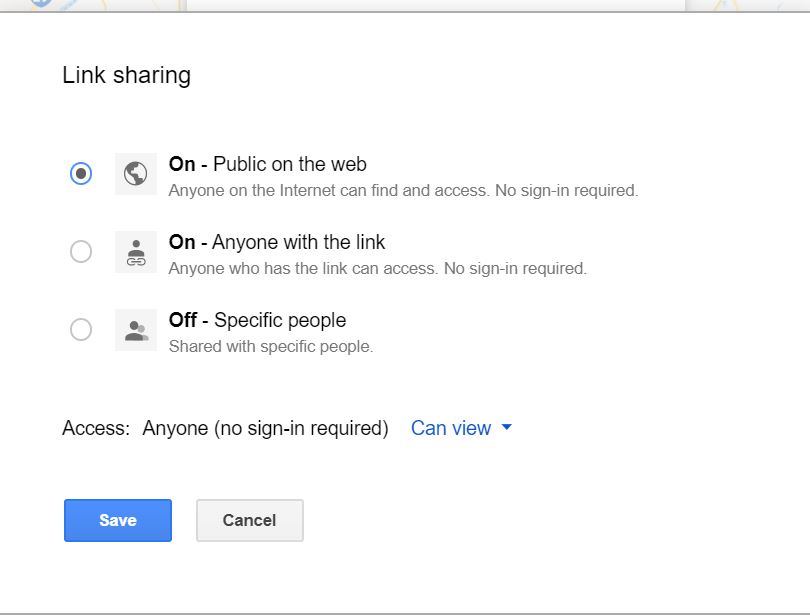
Click on Save.
Click on Done.
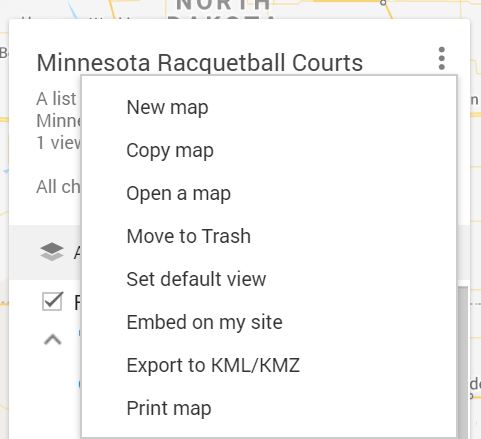
Next to the Name of your map, click on the three dots.
Choose Embed on my site.
Copy the Embed text and paste it into the webpage where you want the map to be shown.
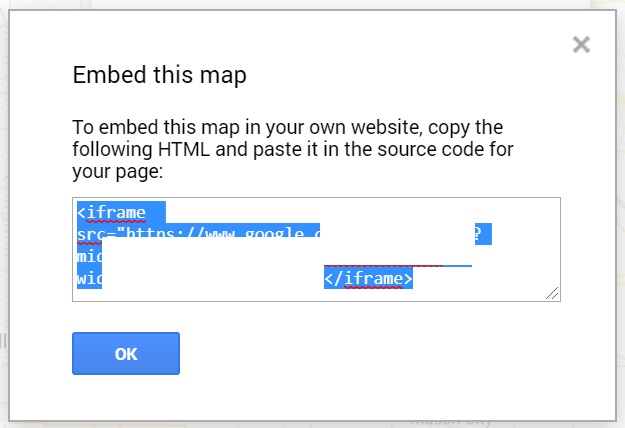
Then click on OK to close the dialog window.
Reload or refresh your website page where you put the Embed code, and you will now see your map.
Enjoy!
![]()